|
|
Full Size Knitting
|
 |
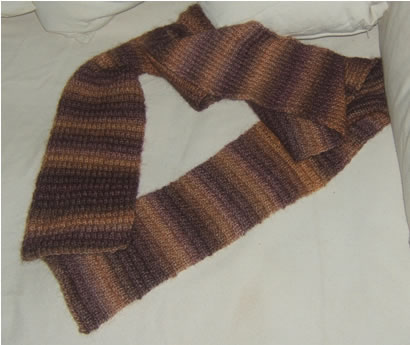
This top picture shows the reverse only. The scarf is now finished. At £3.50 a 50g ball I balked at the idea of a longer scarf. The scarf has already taken three balls. I could have made it longer if I had used thicker needles and garter stitch, but I wanted something with more substance to it. I decided against a fringe as the yarn quickly looks very fluffy and a fringe would therefore look messy.
 |
This picture shows the broken rib on the front.
 |
 |
Two other scarves knitted this summer for our two daughters. They have all taken the same amount of wool, but the top one is the longest, but narrowest, wih the bottom one coming in between the other two in length and width.
 |
This is the sampler scarf that I first knitted when I transferred back to full sized knitting. It is ideal hidden under a coat for extra warmth. It curls up too much to wear outermost.
 |
This hat was made using one of the Turkish patterns from Anita Zilboorg's books - Fancy Feet.
 |
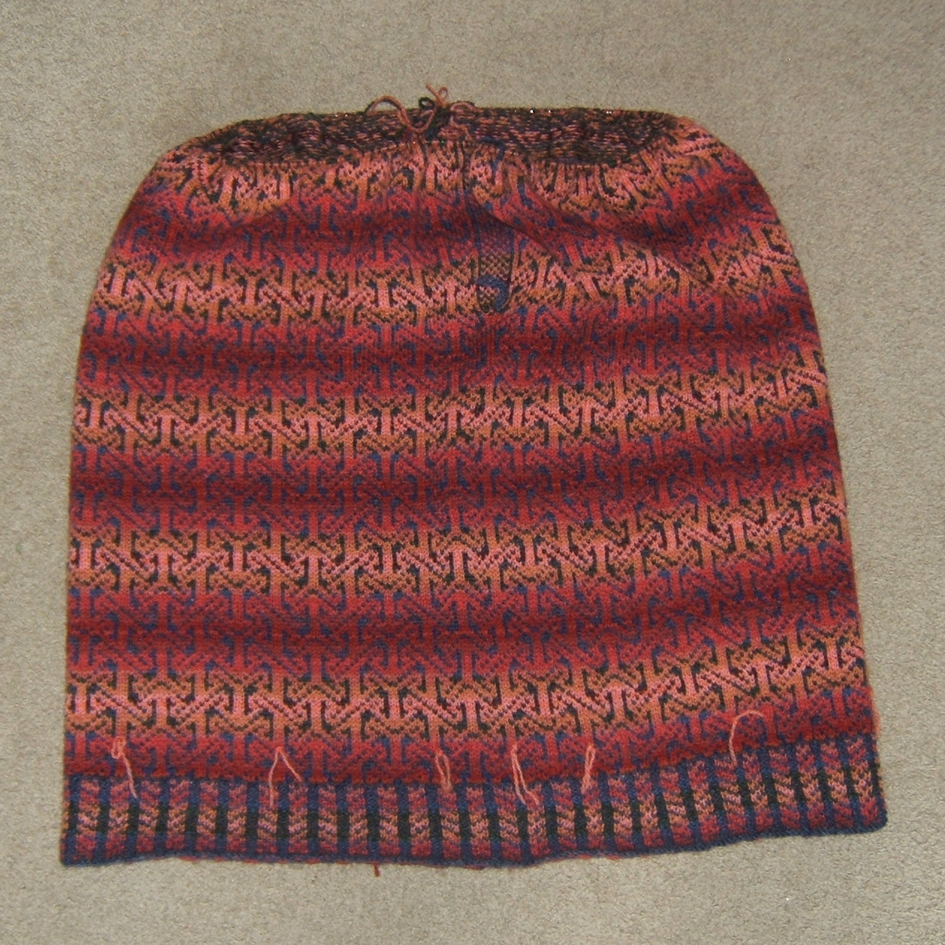
This is a sweater that I am making from Jamieson's Shetland Knitting book no 2, 'Sandness'. It is my first one done in the round with steeks. The picture below shows a closeup of one of the armhole steeks. Click for a huge close up of the sweater. It will be a lot bigger and flatter once it's blocked on the wooly board that I've ordered. (The ties at the bottom are to mark where the pattern repeats start.) Click for a larger view, but be aware that it is a very large file.
 |
This is the armhole steek. There is one extra stitch cast on to the body of the sweater. This is held with the blue thread. There is a gap between the base of the steek and the rest of the sweater which will give a convenient place to cut up the middle of the steek. I hope I'm doing this right!
 |
This picture was taken after I'd done an initial blocking. I wet stretched it over a flat area of an airing rack. It gained 6-7 inches in girth and I can see that I can probably increase its size a bit more when I put it on the wooly board once the sleeves are done as well. (Click for closer image, but be aware it's a huge file).
 |
Different lighting, different effect,
I think the one above is more accurate. Anyway this shows the neckline
completed, it's slightly narrower than the pattern but it fits round the
neck OK.
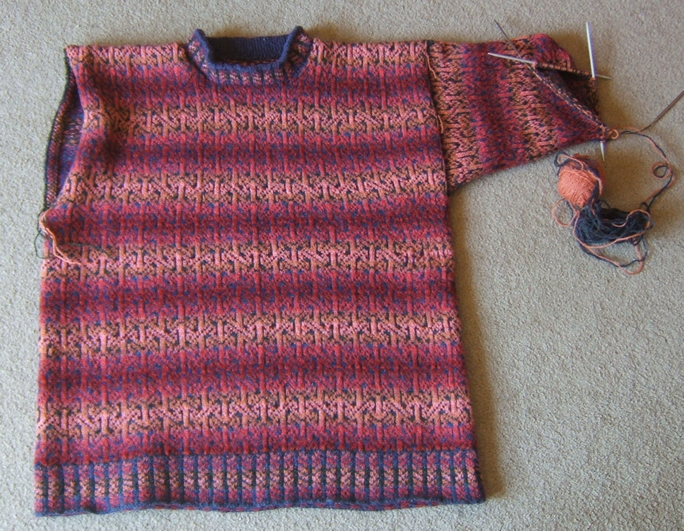
I'm using a combo of straight dpns and one short circular to make the
sleeve. The other side is pulled sideways to show the cut steek. I didn't
even need to lie down in a darkened room with a glass of wine after cutting
it.... just machined it either side of the cutting line. I've already
picked up the stitches for the sleeve on that side and put them on a thread.
 |
The completed sweater. It stretched very nicely from an original chest measurement of 38 inches to 50 inches! It's still a bit small as a sweater of this style (stripes) needs lots of flop. So I've ordered another kit to do it. I've learnt a lot of lessons in doing this first one. I was rather tight with the two-handed method, so I need to loosen up, also I know not to be afraid of steeks, they're no problem. You may also notice that the neckline is a lot wider which is how it should be
![]()
Finally! I finished a second sweater using the largest size, loosening my tension and using one size bigger needles. I also picked up more stitches around the neckline as the first one only went over our head after it was stretched to within a millimetre of its life. The first rather limp one lay around for months with me threatening to turn it into a cushion cover - at least it wouldn't be totally wasted. Until I thought of the obvious. Turn it into a jacket. The Philosopher's Wool Company merrily turn sweaters into cardigans, so why couldn't I? I picked up stitches either side of the centre, allowing enough 'waste' for two turnbacks. I knitted the bands in rib with a plain stocking stitch facing. I then machined either side of the centre cutting line and merrily cut it. I fail to understand why people are so fearful of cutting their knitting - if it's machined down it's not going to suddenly fall to pieces, especially when it's such a dense fabric that two colour knitting is. Anyway, you can see the result below.
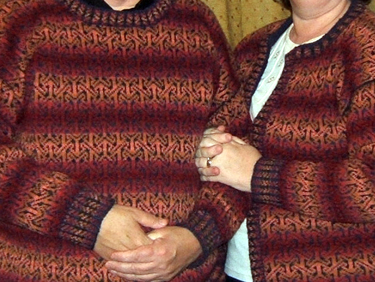 |
I've been forbidden to put the complete version of our 'twinnies' outfits by our daughters as they think we're total geeks. We're certainly not allowed to wear them together. LOL
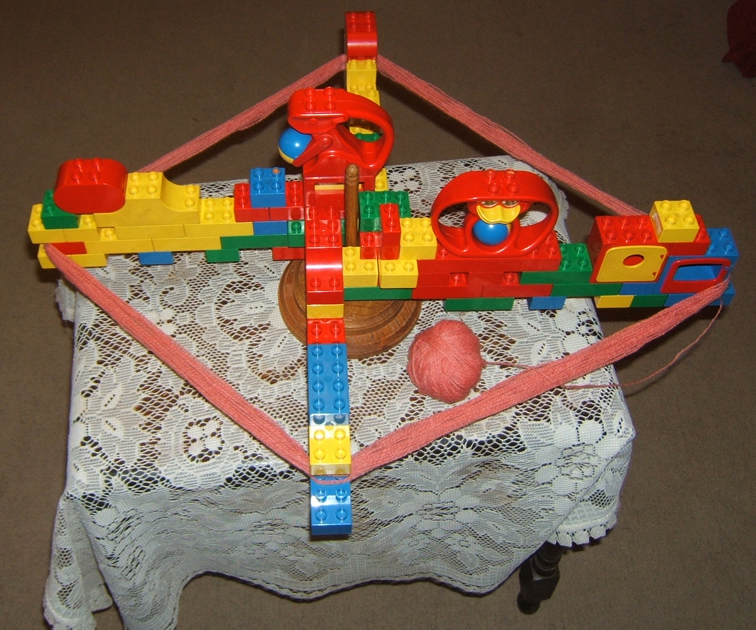 |
Bet you've not seen anything quite like this! I only had a couple of skeins to do, but it was enough to keep putting it off. I'd seen someone make a swift out of an old Tinker Toy set, and that got me thinking of what I have in the house already. The turning mechanism was easy as I already have a widget made to put a ball of wool on. It turns due to ball bearings between the two bases. That was specially made about 20 years ago at my request as I'd seen an advert for something like it and the man in question made several as fundraisers. So it was just a question of making sturdy enough arms long enough to support the skein. OK it won't do dozens, but it was strong enough to do what I needed without collapsing. It brought back loads of memories of my children playing with the Duplo, and it worked.
 |
A bit of high tech modification ;-) I found the perfect piece of thick card to place under it to help prevent 'arm droop and break off'. It also means I don't have to glue the whole thing together so that I can store it for reuse. I already have the perfect storage case for it - it's called a black bin liner. Hah! IT WORKS - and as Mary who wrote to me about it said - "That makes me want to dig out my son's old tinker toys and duplos. It is the ultimate in recycling". :-). Ever thought a homemade swift would reduce your carbon footprint? LOL
 |
 |
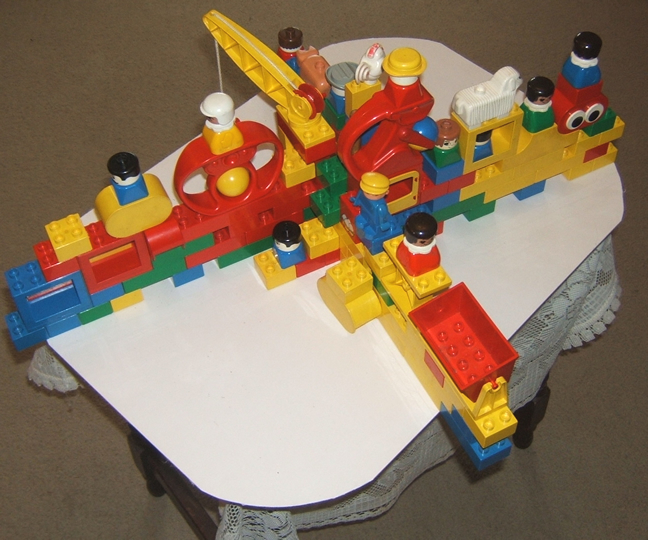
Of course, with anything high tech there always comes a version 2. This is what we call in the industry 'playing'.
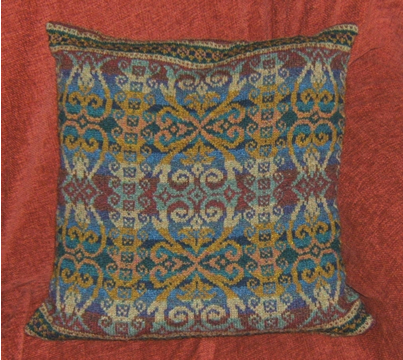
This Tudor cushion was a kit from Virtual Yarns. I had to find the out of print book Tudor Roses in order to knit the pattern, but it was worth the high cost as the text and patterns are really delightful and I can see me doing other cushion covers from it. I had expected it to be a lot brighter in colour to go with the terracotta in our living room, but I was told that my monitor was suspect if I was seeing orange on their site. Funny how this same monitor is showing my work as more muted despite the correct colour for my own cover in the background.
 |
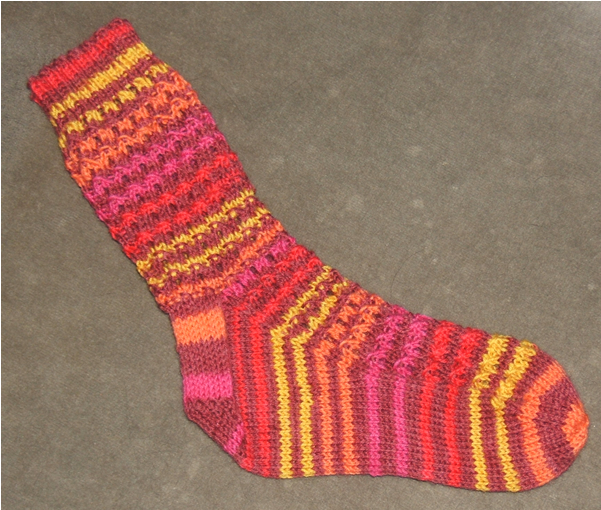
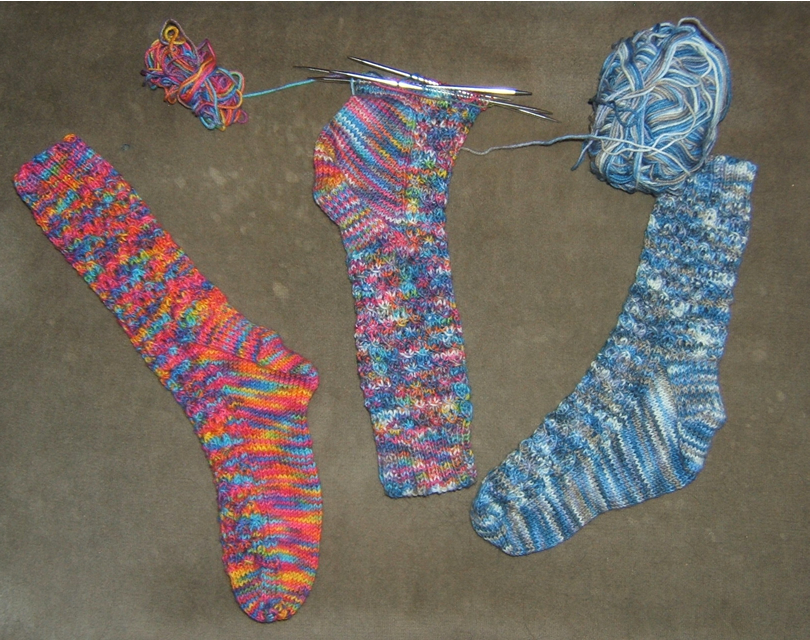
When I first returned to full sized knitting after about 20 years of course the internet opened everything up so much wider than before. Everybody seemed to be talking about socks socks socks. I couldn't understand the obsession! Anyway my eldest said she'd love a pair, so after many months of waiting, I've finally done one for her. Just hitting the 'second sock syndrome' as I write. They're actually fun to make!
 |
The pattern for this from here
 |
So much for not wanting to knit socks - I can't stop! I finished the first pair above and gave them to one daughter and immediately our second daughter wanted some too. Having finished three more pairs in the last couple of weeks I then ran out of yarn (I don't have a stash) but came up with a workable solution. All the socks took just over one 50g ball which meant that I had enough left of each colour for one sock but not a pair of socks. So I took the two balls that changed colour frequently and did a row of each - you can see that the one unfinished sock is a combination of the colours on either side. I think it works pretty well! The only bit that I did with one yarn is the short rows - but that will be unseen when wearing.
 |
Click for what I think is a better close up and comparison
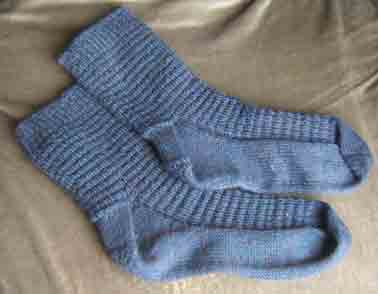 |
A pair for myself using my favourite stitch, broken rib.
 |
Socks done in the popular monkey pattern. I have done another pair without any purl stitches in the same yarn as the brown cushion below.
A TIP
One of the hardest things I have found with double pointed needles is casting on. Keeping the stitches facing the same way and not twisting around the needles with the risk of the knitting then being permanently twisted is hard. My problem is also exacerbated by using slippery needles, but they are a joy to work with and I wouldn't choose to go back to ones that grip more.
Use some of that non-slip matting that comes on a roll and can be cut for tray mats etc. Push the needles through the holes, crossing them over so that they lay flat. This keeps them in order and well behaved until you have joined the first and last stitches. No more chasing the stitches round the needles only for the next needle to play up.
The same matting is ideal for keeping needles together. And finally, ta dah, a small piece can be used to prevent stitches coming off the needles in storage. You could turn a dpn into a regular needle or anchor the two needles together for storage. I use fine needles and I can even keep my miniature needles together by pushing two through the same holes. Snip the rubber to make bigger holes for bigger needles.
Oh, just thought of another idea -small bits would make stitch markers at a pinch.
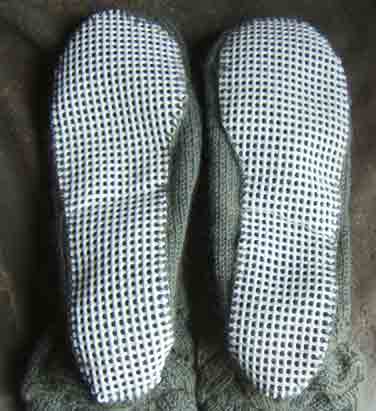
And how about using it for non-slip soles for slipper socks?
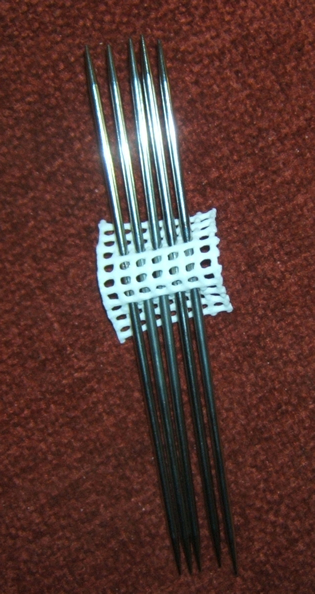 |
You could make a very nice needle holder with a long strip of the matting along the centre. I've made a holder before with narrow pockets, but they sometimes slipped out. Even works with the finest of miniature needles, put two needles together in the same holes. Even my size 24s fit snugly.
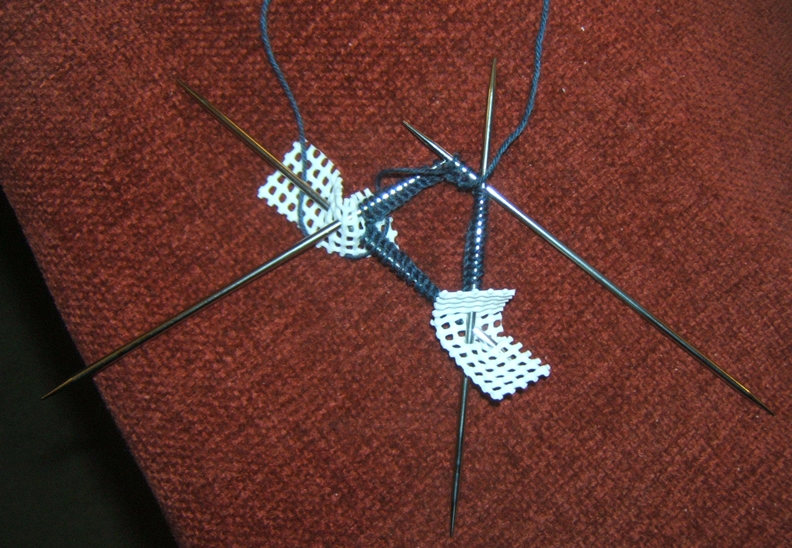 |
Casting on in the round - the pieces keep the needles steady and you can pull and push the needles to exactly the spot you need, the material is flexible.
 |
These tiny pieces actually make excellent stitch markers. They don't dangle and get caught in the knitting and if you lose one you can make thousands more!
 |
Keeps the needles together in your bag.
And now for the slipper sock soles
 |
 |
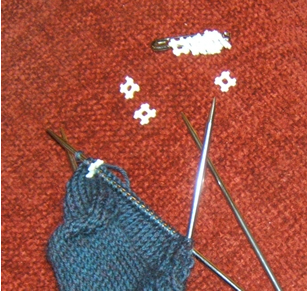
Joining stitches when on a circular needle is fraught with possibilities of twisting - which only shows up after a few rows! Because this work is going to be stranded two-colour knitting I didn't want to use the other trick of working a few rows flat as it would mean that I would have to purl with two colours which would possibly give a different tension than the rest of knitting, plus it would slow me down. This is a padded neck pillow. by pinning it on it I can get that all important first stitch right. After that, it can do what it wants, it won't be twisted. Don't pin to an inflatable pillow!
Also, it is useful to use a safety pin to pin the first and last stitches together so that they don't twist for the second row - if they twist it probably wouldn't show up until later. The pin will prevent that.
 |
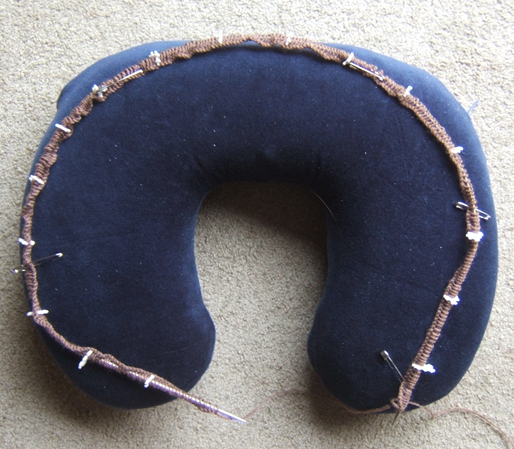
Is there no end to uses for rubber matting? Whenever I've done two colour cushion covers they curl up like crazy because they are stocking stitch / stockinette and there is no rib like there is on a sweater. This is an intriguing pattern by Kieran Foley again, and I couldn't even straighten it out to see it! I sewed it on to a long strip of the matting, using huge stitches, and voila! it doesn't curl any more. The matting is flexible and really doesn't get in the way of me knitting. It may have done so if I'd done it when the work was only an inch or so long, but not now.
Abd another use! When adding a lifeline for lace by adding the line to a square of the matting, it prevents it from running back through the stitches.
 |
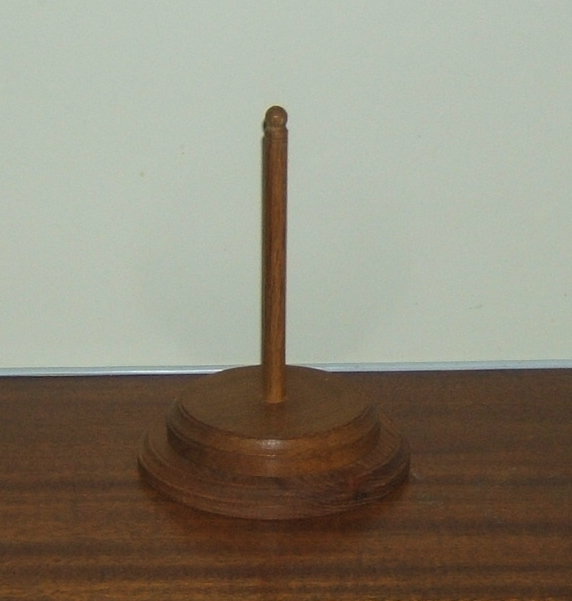 |
This is my yarn spinner, made for me 20 years ago by a good friend. It has a 'lazy susan' ball bearing unit between the two bases.This means that a ball of yarn can turn with you while you knit, it stops the ball rolling around of course. The yarn will sometimes turn by itself around the spindle, but many times it will catch and that's when the ball bearing unit will keep it turning. A version of this can still be found at
http://www.dragonflyyarnshop.com/the-pirouette.html
 |
This is the seam of a finished cushion cover that I have made. I did it in the round, with the front being the cats paw pattern from an old book that my mother had, and the back is the reverse of broken rib (also used for the three scarves).
 |
I did the seam by three needle bind off. I love that technique, you reduce the cast offs by half as you do two at a time, and you get a perfect sewn seam by the end of the row. I used a slightly smaller needle as the working needle and there is no stretched side as I would have had with casting off all round.
 |
This is another cushion cover made for my other daughter. It's done in a simple basketweave stitch (5 knit 5 purl over seven rows). The reverse is broken rib stitch like the cat's paw one above. I picked up about 30 stitches at each end of the open side and used three needle bind off to 'stitch' them together. This will ensure that the corners are straight, and the middle bit will be left to my daughters to sew up when they've filled them. I'll put a small skein of matching wool inside the covers so that they'll know where it is when they come to wash them!
 |
 |
This is an apple cosy requested by my daughter. She had seen one for sale elsewhere and I challenged myself to make one up as I went along. On the second attempt I made it. The original had more covering for the apple at the top, but it will do for now!
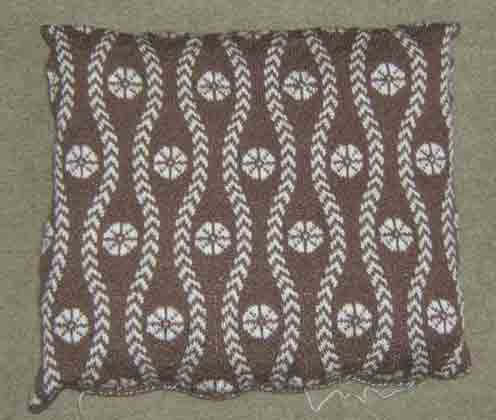 |
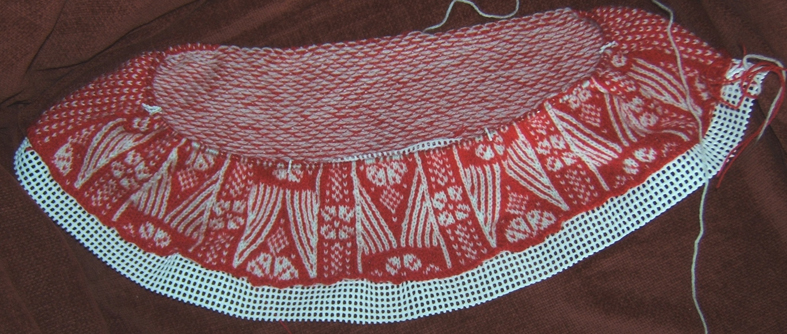
Kieran Foley does some wonderful variations
on "Fair Isle" patterns. With clever increases and decreases
the stitches ebb and flow. See more of his patterns at http://www.KieranFoley.com
This pattern is called Fair Isle Chevrons.
It is temporarily stitched together at the bottom, awaiting a zip. As
is the one below. This one is called Cartouche. Will be a pyjama case.
 |
 |
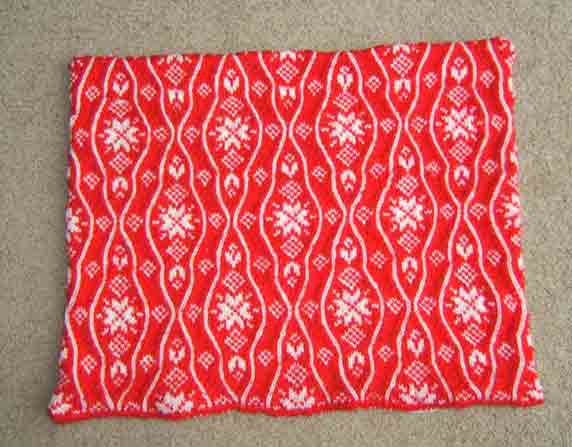
This cushion is now finished. I know the picture is shadowy, but it shows up the texture of the ridge of double decreases.
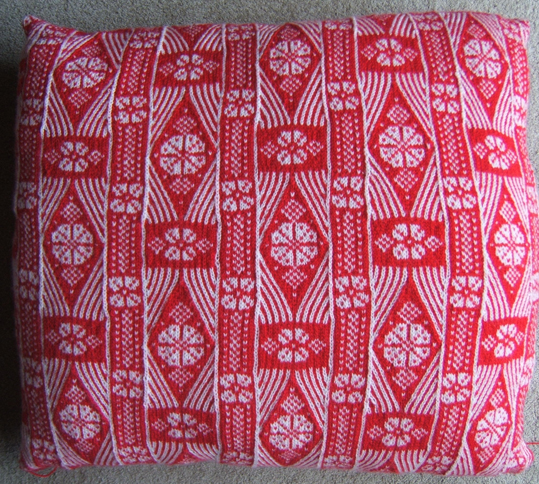 |
This one is called Diamond Stripe. The pattern came as a bit of a surprise as I worked it. I began to see the wavy lines in the background and the circles that they made. The repeats are quite big and the total width of this cushion is 24 inches.
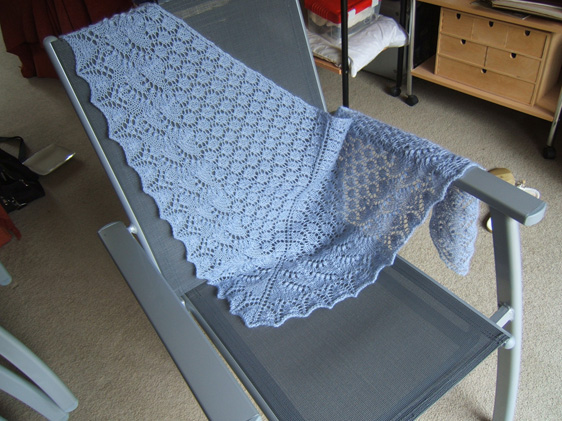 |
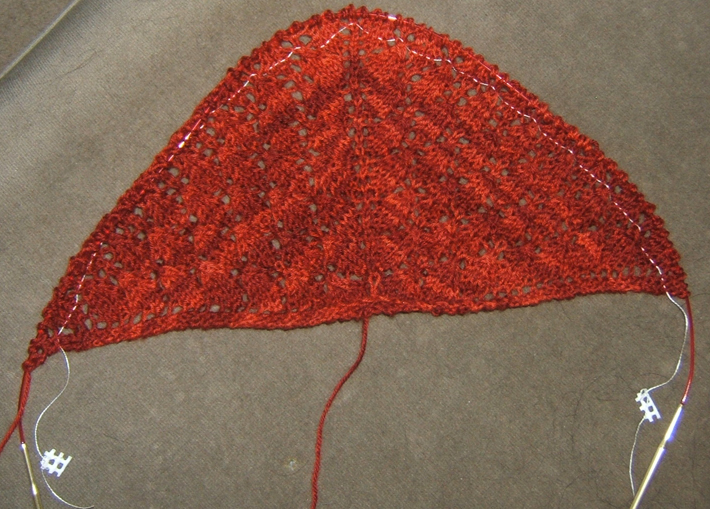
This is a lovely shawl pattern from Evelyn A Clark called Swallowtail. I've made two identical blue ones, and am now working on a terracotta coloured one which will have extra repeats.
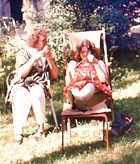 |
A picture of me trying to learn to knit the Continental way in 1983. I never mastered the technique with the yarn held so high. The video links at the top of this page include me knitting with two hands, but I hold the yarn on my left index finger itself.
![]()
